


There’s no shortage of SEO advice. A clear, sequenced guide to where to start is harder to come by.
This guide provides that. It picks up where our What Is SEO? guide leaves off. If you haven’t read that one yet or want to brush up on the fundamentals, start there. It covers how search engines crawl, index, and rank pages; the three pillars of SEO; the tools worth learning; and other SEO basics. This one covers implementation.
It’ll walk through eight phases, each building on the last and each ending with a checklist you can use as your task list. Read it from start to finish first so you understand how the phases connect and can prioritize accordingly.
The examples in this guide lean toward professional service businesses, law firms in particular because that’s the industry we know best, but the framework applies to just about any business trying to earn visibility in search.
Search is also evolving. AI Overviews, LLMs, and new search behaviors are changing how people find businesses online. The fundamentals in this guide account for that. Whatever your industry, begin with Phase 0. You need a baseline before you change anything on your site, or there’s no way to know whether your work is producing results in traditional search, the map pack, or AI search results.
Phase 0: Set Up Your Tracking (Week 1)
Two free tools give you a baseline: Google Search Console (GSC) and Google Analytics (GA4). Set both up before anything else.
Setting Up Google Search Console
GSC shows you how your site performs in Google Search: which queries trigger your pages, how many impressions and clicks you earn, which pages Google has indexed, and any technical issues that exist.
- Go to search.google.com/search-console and sign in with a Google account.
- Add a property. Choose “Domain” to track all versions of your site (recommended), or “URL prefix” for a specific version of your site.
- Verify ownership. The most reliable method is to add a DNS record through your domain registrar (the service where you bought your domain, like GoDaddy). You can also add an HTML tag to your homepage or upload an HTML file.
- Submit your sitemap. Go to Sitemaps under the Indexing menu and enter your sitemap URL, typically yoursite.com/sitemap.xml. (If you’re not sure whether you have a sitemap yet, skip this step. We will show you how to find or generate one in Phase 4.)
Data takes 24 to 48 hours to populate, and GSC only shows data from the point of verification forward, so set it up as early as possible.
Setting Up GA4
GA4 tracks what happens after visitors arrive: where they came from, which pages they land on, how long they stay, and whether they take the actions you want.
- Go to analytics.google.com and sign in.
- Create a new GA4 property and choose Web to set up a data stream for your website. Think of a data stream as the pipeline that carries information from your site to Google Analytics. Because you are tracking a website rather than a mobile app, this pipeline is called a web stream.
- Install the tracking code. Google Tag Manager is the cleanest method for advanced users, but it has a learning curve. For most beginners, especially WordPress users, the easiest way is to install the free Google Site Kit plugin without touching code.
- Verify that data flows by opening the Realtime report immediately after installation.
- Set up Key Events (formerly conversions). At a minimum, track contact form submissions, phone call clicks, and thank you page visits. These connect your organic traffic to actual leads.
Connecting the Two
Linking GSC and GA4 pulls organic search data into GA4 alongside your on-site behavior data, giving you a more complete picture of how search traffic performs from click to conversion.
Before you start, confirm that the same Google account has admin access to both your GA4 property and your GSC property.
- In GA4, click Admin in the bottom left corner.
- Scroll down to Product Links and click Search Console Links.
- Click Link.
- Click Choose accounts and select your GSC property from the list.
- Click Confirm, then Next.
- Select the data stream you want to associate with the GSC property.
- Click Next, review the settings, and click Submit.
The connection takes up to 24 hours to activate. Once it does, organic search data from GSC appears in GA4 under Reports > Search Console. There, you’ll find breakdowns by query, landing page, country, and device.
Record Your Baseline
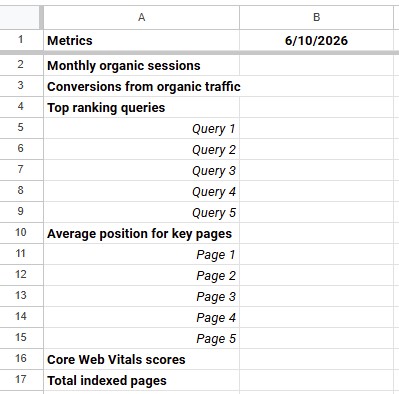
Click to enlarge
Before making any changes to your website, record where you stand.
- Create a spreadsheet and name it Master SEO Workbook. Name the first tab Baseline Metrics. You’ll come back to these numbers when measuring your progress.
- Set up two columns: Column A for the metric name and Column B for your baseline value. Add today’s date in Cell B1.
- For most metrics, you’ll use one row per metric. Top Ranking Queries and Average Position for Key Pages each get their own section with one row per query or page. Add as many rows as you need, up to 10 for each.
- Then, find your baseline numbers using the “Where to Find It” column in the table below and enter them in Column B.
Metric | Where to Find It |
Monthly organic sessions | GA4 > Reports > Generate leads > Traffic acquisition |
Conversions from organic traffic | GA4 > View user engagement & retention > Events (populates after Events are set up) |
Top ranking queries (one row per query, up to 10) | GSC > Performance > Queries |
Average position for key pages (one row per page, up to 10) | GSC > Performance > Pages |
Core Web Vitals scores | GSC > Experience > Core Web Vitals |
Total indexed pages | GSC > Indexing > Pages |
Note: As your SEO efforts mature, you may eventually add complex dashboards, advanced scripts, or deeper metrics to your workflow. But for now, keep it simple. This single workbook covers the exact fundamentals you need to execute this guide without getting paralyzed by data.
Setup Checklist
Task | Tool | |
Set up GSC and verify ownership | GSC | |
Submit your sitemap | GSC | |
Set up GA4 and install tracking code | GA4, GTM | |
Verify GA4 is receiving data | GA4 Realtime | |
Link GSC and GA4 | GA4 Admin | |
Set up Key Events | GA4 | |
Record baseline metrics | Spreadsheet |
Phase 1: SEO Audit (Week 1)
An SEO audit gives you a clear picture of where your site stands before you start making changes. It covers four areas: technical health, content, backlinks, and search performance. Each area tells you something different about why your site is or isn’t earning visibility.
Technical Health Review
Technical issues hold back your site and, in turn, your business. A site can look polished on the surface while having crawl errors that prevent Google from indexing key pages, redirect chains that lose link equity, or page speed issues that produce poor Core Web Vitals scores.
Follow this step-by-step workflow to audit your technical foundation and preserve the data in your Master SEO Workbook.
Note: Do not worry about fixing these errors right now. Trying to optimize your site mid-audit is a quick way to get overwhelmed. You’ll use the data you collect in this phase later in Phases 3 and 4.
Step 1: Prep Your Master SEO Workbook Tabs
Before opening any tools, prepare the sheet for your data. Open your Master SEO Workbook (the spreadsheet you created in Phase 0) and add five new blank tabs:
- Name the first new tab Technical Master
- Name the second new tab Redirect Audit
- Name the third new tab GSC Tech Issues
- Name the fourth new tab CWV Issues
- Name the fifth new tab Image Audit
Step 2: Run Your Screaming Frog Crawl
Screaming Frog is a desktop application that crawls your site similar to how Googlebot does, and surfaces technical issues across your pages.
- Download and install the free version (up to 500 URLs) on your computer.
- Now open Screaming Frog. You’ll see a URL bar at the top.
- Type your domain (yoursite.com) into the URL bar and click Start.
- Let the crawler run until it reaches 100% and stops. On a site with a few hundred pages, a crawl typically takes a few minutes.
Step 3: Customize and Export Your Technical Master Data
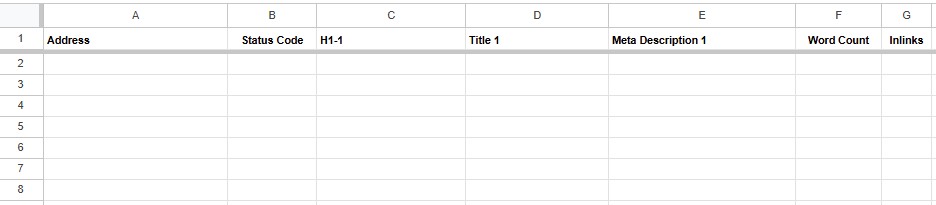
Click to expand
The free version of Screaming Frog does not save your data when you close the program. So you’ll have to export a single master report. And to make the report manageable, filter it down to just the essential metrics.
- Click the Internal tab at the top of Screaming Frog.
- Change the Filter dropdown (top left corner under the tabs) directly below it from All to HTML. This hides images, CSS, and script files so you only see pages.
- Click the plus sign (+) icon located at the far right edge of the column headers.
- Uncheck everything except these columns:
- Address
- Status Code
- H1
- Title
- Meta Description
- Word Count
- Inlinks (This counts how many other internal pages link to the URL)
- Click the Export button directly above the data grid (next to the Filter dropdown). Save it as a CSV.
- Open that CSV, copy all of the data, and paste it directly into the Technical Master tab of your Master SEO Workbook.
Step 4: Export Your Image Data
- While you’re still in Screaming Frog, go to Bulk Export > Links > All Image Inlinks and save as a CSV.
- Open that CSV, copy all of the data, and paste it directly into the Image Audit tab of your Master SEO Workbook.
The export gives you three things you’ll use in Phase 5:
- Page each image appears on (Source column)
- Image file URL (Destination column)
- Alt text (Alt Text column)
Rows with a blank Alt Text column are missing alt text entirely. Scan the Destination column for generic file names like IMG_4032.jpg or AdobeStock_239443198.jpeg. Those need to be renamed.
Step 5: Export Your Redirect Chains
Because redirect chains track how pages connect sequentially, they cannot fit into the single-row layout you just exported in the Technical Master tab. You need to pull this report separately:
- In Screaming Frog’s top menu bar, click Reports > Redirects > Redirect Chains.
- If there’s nothing listed but the header row, you don’t have any redirect chains.
- Save that file as a CSV, open it, copy the data, and paste it directly into the Redirect Audit tab of your Master SEO Workbook.
You can now safely close the Screaming Frog application.
Step 6: Export Page Indexing Errors from GSC
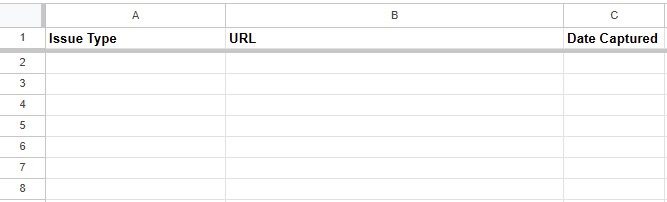
Click to enlarge
Now you will look at your technical health through Google’s eyes to see what errors are actively preventing your pages from ranking or delivering a good user experience.
Finding indexing errors (Page Indexing report):
- In GSC, click Pages (under Indexing) in the left sidebar.
- Below the chart, look at the table labeled “Why pages aren’t indexed.”
- Before you start exporting, set up your GSC Tech Issues tab. Add a header row with three columns: Issue Type | URL | Date Captured.
- Click into each reason in the table one at a time to see the affected URLs. For each one, click the Export button at the top right, paste the results into your GSC Tech Issues tab below the header row, and type the issue name into the Issue Type column for each row you just pasted.
- As you work through each reason, look out for these common culprits:
- Excluded by robots.txt: A rule in your robots.txt file is blocking Google. This is often an accidental error introduced during a site update or launch.
- Page with redirect: Google found this URL, but it redirects to another page. This is expected for properly redirected URLs, but it is a problem if a page you want indexed shows up here.
- Crawled, currently not indexed: Google visited the page but chose not to include it. Thin content, duplicate content, or low perceived quality are the most common reasons.
Step 7: Log Core Web Vitals Issues from GSC
-

Click to enlarge
Before you start logging, set up your CWV Issues tab with five column headers: Platform | Severity | Issue | Example URL | # Affected URLs.
- In the GSC left sidebar, click Experience > Core Web Vitals.
- Check both the Mobile and Desktop reports. This report shows you how many pages across your entire site are affected by each issue.
- Click into any group flagged as “Poor” or “Needs Improvement.”
- On the next screen you’ll see the issue name in the breadcrumb at the top (e.g., “LCP issue: longer than 2.5s (mobile)”), the number of affected URLs on the left, and the severity label on the right.
- Log those three things in your CWV Issues tab: the issue name, how many URLs are affected, and whether it’s Poor or Needs Improvement. Repeat for each flagged group.
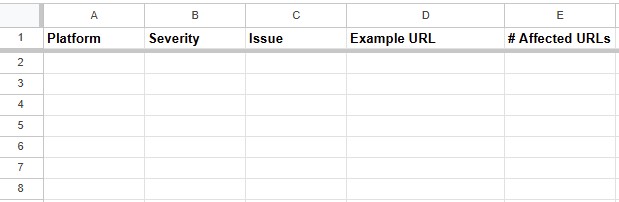
One thing worth knowing before you dig in: GSC groups URLs by pattern rather than listing every affected page individually. If 189 FAQ pages share the same issue, GSC treats them as one group because they’re all built from the same template. You’ll see this reflected in the URL structure, for example all pages under /faqs/ grouped together. Fix the template and you fix all 189 pages at once, which is a very different conversation with a developer than handing them a list of individual pages.
When you’re ready to act on these issues, you’ll use PageSpeed Insights to get page-level diagnostics and specific fix recommendations for your most important URLs. We cover that in Phase 4.
Content Review
A content audit reviews every page on your site and decides what to do with it. Thin, outdated, or duplicated pages dilute your topical authority and make it harder for your strong pages to rank. You can also use the audit to spot gaps in your topic coverage that you’ll fill later while building your content calendar.
Follow this step-by-step workflow to audit your existing content.
Step 1: Prep Your Content Audit Tab
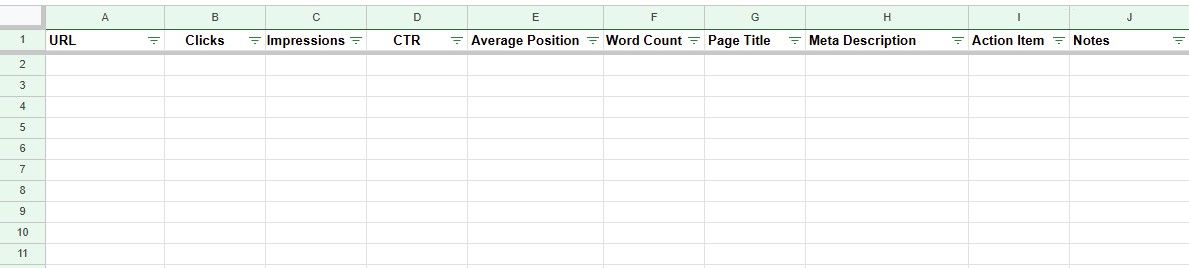
Click to expand
Open your Master SEO Workbook and add one new blank tab:
- Name the tab Content Audit.
- In row 1, set up these column headers across the top:
- URL
- Clicks
- Impressions
- CTR
- Average Position
- Word Count
- Page Title
- Meta Description
- Action Item
- Notes
Step 2: Export Your Search Performance Data from GSC
Pull real-world traffic data from Google Search Console to see which pages are actively earning impressions.
- In GSC, click Performance in the left sidebar.
- Scroll down to the data table below the graph and click the Pages tab.
- Click the Export button in the top right corner of the screen and select Download CSV
- Open that downloaded file, copy all rows of data (excluding the header row), and paste them directly into columns A, B, C, D, and E of the Content Audit tab.
Step 3: Cross-Reference with Your Screaming Frog Data
Because you already saved your crawl data into your Technical Master spreadsheet tab earlier, you do not need to reopen Screaming Frog. You will pull the page lengths and metadata directly from that tab into your Content Audit tab using a formula.
In cells F2, G2, and H2, paste the following formulas:
Word Count (Paste into F2)
XLOOKUP (Google Sheets / Modern Excel): =XLOOKUP(A2, 'Technical Master'!A:A, 'Technical Master'!F:F, "")
VLOOKUP (Older Excel): =IFERROR(VLOOKUP(A2, 'Technical Master'!A:F, 6, FALSE), "")
Page Title (Paste into G2)
XLOOKUP: =XLOOKUP(A2, 'Technical Master'!A:A, 'Technical Master'!C:C, "")
VLOOKUP: =IFERROR(VLOOKUP(A2, 'Technical Master'!A:C, 3, FALSE), "")
Meta Description (Paste into H2)
XLOOKUP: =XLOOKUP(A2, 'Technical Master'!A:A, 'Technical Master'!D:D, "")
VLOOKUP: =IFERROR(VLOOKUP(A2, 'Technical Master'!A:D, 4, FALSE), "")
Once you have pasted the formulas into cells F2, G2, and H2, highlight all three of those cells. Click and hold the tiny square in the bottom-right corner of your selection, and drag it all the way down to the bottom of your sheet to fill the columns instantly.
Finally, highlight columns F, G, and H entirely, copy them, right-click, and choose Paste as Values (or Paste Special > Values Only). This freezes the text in place and removes the active formulas, so your spreadsheet doesn’t lag or freeze up when you sort your data.
Step 4: Analyze and Categorize Your Content
With your traffic metrics and page elements sitting side-by-side, go through your spreadsheet row-by-row. Use the performance patterns below to diagnose each URL, and immediately type one of four decisions into Column I (Action Item):
- Keep: Assign this to pages that earn steady impressions and clicks, have a solid word count, and serve a clear purpose. Leave these as-is for now.
- Update and Improve: Assign this to pages that fall into two problem areas:
- High impressions, but low clicks: Google is showing your page, but users are scrolling past, perhaps because your title tag or meta description is weak.
- Zero traffic, but a necessary topic: The page covers an important topic but has thin content (under 300 words) or outdated info and needs a rewrite.
- Consolidate: Assign this if you spot multiple pages targeting the same keyword or topic. This means your pages are competing against each other. Choose the strongest URL to keep, and flag the weaker overlapping pages to fold into it later.
- Remove and Redirect: Assign this to pages that are outdated, offer zero value to your audience, and have no search viability. You will flag these for deletion and a 301 redirect to the most relevant live page on your site.
Backlink Profile Review
When a high-quality, relevant site links to you, it passes authority (often called link equity) that helps your pages rank higher. However, a healthy backlink profile requires monitoring to ensure your links are active, point to the correct live pages, and come from trustworthy sources.
Follow this step-by-step workflow to audit your backlinks.
Step 1: Prep Your Backlinks Tab
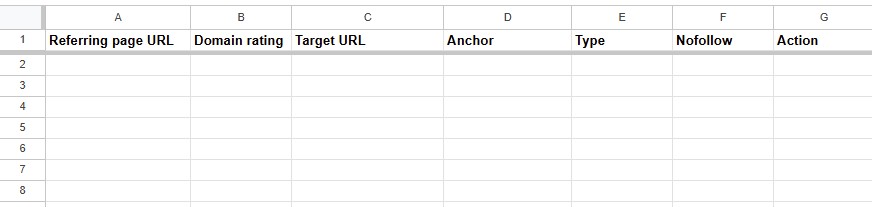
Click to expand
Open your Master SEO Workbook and add two new blank tabs. Name the first Backlink Audit and the second Broken Backlinks. Set up these column headers in row 1 of each tab.
- Backlink Audit: Referring Page URL, Domain Rating, Target URL, Anchor, Type, Nofollow, Action
- Broken Backlinks: Referring Page URL, Domain Rating, Target URL, Target Page HTTP Code, Anchor, Redirect Chain URLs, Nofollow, Type, Action
Step 2: Export Your Link Data
Use Ahrefs Webmaster Tools (AWT), which is free for site owners.
- Go to ahrefs.com/webmaster-tools and sign up using your Google account. This verifies your site via your Google Search Console data.
- Once inside your dashboard, click Site Explorer in the top navigation and enter your domain.
- In the left-hand sidebar under Backlink profile, click Backlinks.
- Click Export and download as a CSV. Ahrefs exports dozens of columns you don’t need, so copy only these six into your Backlink Audit tab:
- Referring page URL
- Domain rating
- Target URL
- Anchor
- Nofollow
- Type
A quick note on the Nofollow column: a value of FALSE means the link passes authority to your site. TRUE means the linking site has marked it as nofollow, which tells Google not to pass authority through it. Both are worth knowing about, but dofollow links (labeled FALSE here) carry more weight.
Step 3: Export Your Broken Backlink Data
-

Click to expand
In the Ahrefs left-hand sidebar under Backlink profile, click Broken backlinks.
- Click Export and download as a CSV. Copy these eight columns into your Broken Backlinks tab:
- Referring page URL
- Domain rating
- Target URL
- Target page HTTP code
- Anchor
- Redirect Chain URLs
- Nofollow
- Type

Step 4: Analyze Your Link Profile
With your data in place, scan your Backlink Audit tab to evaluate what you have.
- Authority and trustworthiness: Scan your Domain Rating column. Links from sites with a DR above 30 are generally strong signals, especially when Nofollow is FALSE, meaning the link passes authority to your site. You don’t need to label these. They are doing their job.
- Anchor text: Look down your Anchor column. A natural profile is a mix of your brand name, generic text like “click here,” and raw URLs. If you see identical keyword-rich anchor text repeated across dozens of different sites (e.g., “best personal injury lawyer”), note “Over-optimized” in the Action column. That’s a pattern worth varying in future link building.
- Low-quality links: You will spot links from strange directories or scraper sites with a DR of 0 or 1. Leave them alone. Google’s algorithms ignore these automatically. They are harmless.
- Broken links: Your Broken Backlinks tab already isolates these. You will address them in Phase 4.
Search Performance Review
A search performance audit tells you how users find your site. By looking at your impressions, clicks, and average rankings, you can identify your opportunity keywords, which are terms for which you’re ranking on the edge of the top positions.
Follow this step-by-step workflow to audit your search footprint.
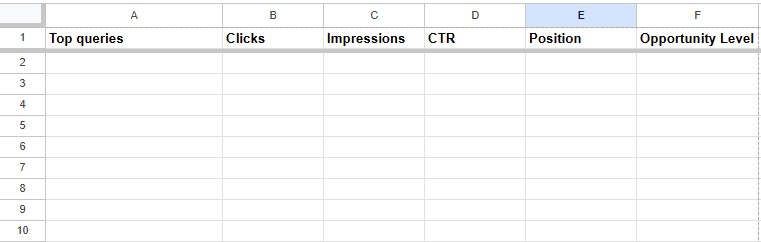
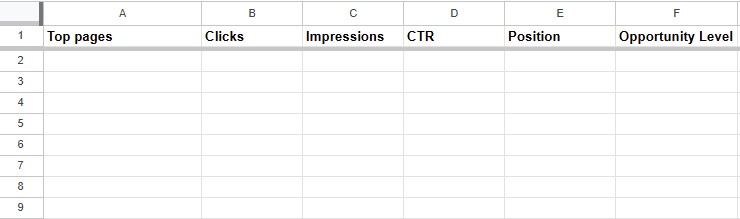
Step 1: Prep Your Search Performance Tab
- Open your Master SEO Workbook and add two new blank tabs.
- Name the first Search Performance – Queries and the second Search Performance – Pages.
- In row 1 of your Search Performance – Queries tab, set up these column headers:
- Top Queries
- Clicks
- Impressions
- CTR (Click-Through Rate)
- Position
- Opportunity Level
- In row 1 of your Search Performance – Pages tab, set up these column headers:
- Top Pages
- Clicks
- Impressions
- CTR (Click-Through Rate)
- Position
- Opportunity Level
Click to expand
Step 2: Export Your Query Data
- In GSC, click Performance in the left sidebar.
- Set your date range to the last 3 months to capture recent trends.
- Scroll down to the data table below the graph and click the Queries tab (selected by default).
- Click Export at the top right and download as a CSV.
- Copy the data and paste it into your Search Performance – Queries tab below the header row.
Step 3: Export Your Pages Data
-

Click to expand
In the same Performance report, click the Pages tab in the data table.
- Click Export and download as a CSV.
- Copy the data and paste it into your Search Performance – Pages tab below the header row.
Step 4: Analyze Your Queries
Go through your Search Performance – Queries tab row by row and label each query in the Opportunity Level column.
- High Performer (Positions 1-3): High clicks and a position between 1 and 3. Label it “High Performer.”
- Opportunity (Positions 4-20): Keywords ranking between positions 4 and 20 with a healthy number of impressions. Label these “Opportunity.”
- High Impressions, Low CTR: A query with thousands of impressions but a low click-through rate. Label it “CTR Fix.”
- Irrelevant: Queries that have nothing to do with your business. Label these “Remove and Redirect.”
Step 5: Analyze Your Pages
Now that your queries are categorized, switch to your Search Performance – Pages tab. Here you’re looking at actual pages rather than individual queries, so this is where content decisions start to take shape.
Go through each page and label it in the Opportunity Level column using the same criteria. A page earning strong clicks from a top position is a High Performer worth protecting. A page with high impressions but weak clicks has a CTR problem worth fixing. A page with a position between 4 and 20 and decent impressions is an Opportunity to push higher.
If you want to dig into which queries a specific page ranks for, click into that page in GSC’s Performance report and it will filter the Queries tab to show you. Similarly, clicking into a specific query will show you which page is ranking for it. GSC doesn’t export that relationship in bulk, but it’s there when you need to investigate.
Competitive Analysis
SEO doesn’t happen in a vacuum. Your site ranks based on how strong it is relative to competitors targeting the same users.
Follow this step-by-step workflow to benchmark your authority, surface keyword opportunities, and identify high-value sites linking to competitors that haven’t linked to you.
Step 1: Identify Your Search Competitors
Your search competitors aren’t always the companies you compete with locally or offline. They’re the websites consistently capturing the top spots on Google for your target keywords.
Go to Google and search for three of your core business offerings (e.g., “estate planning attorney [city]” or “organic coffee delivery”). Note the websites that rank in the top three spots across those searches and pick the two or three that appear most consistently. These are the competitors you’ll use throughout this section.
Step 2: Prep Your Competitive Analysis Tabs
Before pulling any data, add three new blank tabs to your Master SEO Workbook:
- Name the first tab Competitor Overview
- Name the second tab Keyword Gap
- Name the third tab Link Gap
Click to expand
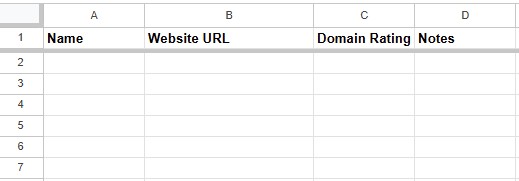
In the Competitor Overview tab, set up these column headers in row 1:
- Name
- Website URL
- Domain Rating / DR
- Notes
Add your own site in row 2, then list your competitors in the rows below.
Leave the Keyword Gap and Link Gap tabs blank for now. The Ahrefs exports in Steps 4 and 5 will populate them.
Step 3: Benchmark Authority Scores
To understand how much ground you need to make up from a link-building perspective, check the Domain Rating for every site in your Competitor Overview tab.
- Open the free Ahrefs Website Authority Checker at ahrefs.com/website-authority-checker.
- Enter each URL one at a time and log the Domain Rating (0–100) in Column C. Do this for your competitors and for your own site.
- If your competitors average a DR of 45 and yours is 12, for example, broad competitive keywords will be out of reach initially. That’s useful context when building your roadmap in Phase 2 because it tells you to prioritize lower-competition, more targeted keywords while you build authority.
Step 4: Run the Keyword Gap Analysis
The free Authority Checker tool doesn’t require an account, but the next two steps do. If you haven’t already, sign up for Ahrefs Webmaster Tools at ahrefs.com/webmaster-tools. Once you’re logged in:
- In Ahrefs, click the All Tools option in the main navigation and select Competitive Analysis.
- Next to Show, select “organic keywords”.
- Enter your site’s URL in the “This target doesn’t rank for” field.
- Add your top two or three competitors’ URLs in the competitor fields.
- Click Show keyword opportunities.
- Filter by Volume (100+ to start) and KD (under 40 for more achievable targets) to narrow the list to realistic opportunities.
- Click Export and download the CSV.
- Open the downloaded file and select all the data. Copy it.
- Go to your Keyword Gap tab, click cell A1, and paste. The full export drops in with Ahrefs’ column headers already in place.
- Find the first empty column to the right of your data and add a header: Opportunity Notes. Use this column to flag the keywords you want to prioritize when you reach Phase 6.
Step 5: Run the Link Intersect Analysis
- From the same Competitive Analysis screen here you did the Content Gap analysis, select Link Intersect on the left sidebar.
- Sort by Domain Rating descending to put the highest-authority sites at the top.
- Click Export and download the CSV.
- Open the downloaded file and select all the data. Copy it.
- Go to your Link Gap tab, click cell A1, and paste. The full export drops in with Ahrefs’ column headers already in place.
- Find the first empty column to the right of your data and add a header: Outreach Priority. Go through the list and label the top 20 most relevant domains “Outreach Target.” These become your first priority when you reach Phase 8.
SEO Audit Checklist
Task | Tab / Tool | |
Run site crawl | Screaming Frog | |
Export Technical Master data | Screaming Frog, Technical Master | |
Export image data | Screaming Frog, Image Audit | |
Export redirect chains | Screaming Frog, Redirect Audit | |
Export page indexing errors | GSC, GSC Tech Issues | |
Log Core Web Vitals issues | GSC, CWV Issues | |
Export and categorize content | GSC, Screaming Frog, Content Audit | |
Export search performance data | GSC, Search Performance - Queries, Search Performance - Pages | |
Export backlink profile | Ahrefs, Backlink Audit | |
Export broken backlinks | Ahrefs, Broken Backlinks | |
Identify search competitors | Google, Competitor Overview | |
Benchmark authority scores | Ahrefs Authority Checker, Competitor Overview | |
Run keyword gap analysis | Ahrefs, Keyword Gap | |
Run link intersect analysis | Ahrefs, Link Gap |
Phase 2: Build a Roadmap (Week 1)
Your audit produced a list of issues and opportunities. Now decide what to address first.
Click to expand
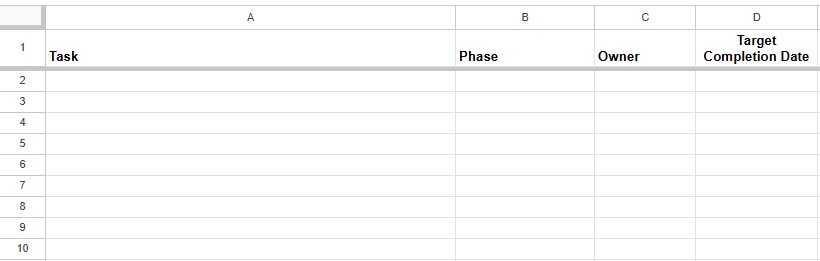
Open a new tab in your Master SEO Workbook and name it Roadmap. Set up four columns:
- Task (column A)
- Phase (column B)
- Owner (column C)
- Target Completion Date (column D)
You’ll populate it as you work through the steps below.
Identify Quick Wins
Go back through your audit tabs one at a time. Each one holds potential quick wins: fixes that are high-impact and low-effort. These are things you can act on without a developer or a full content strategy. Here’s what to look for in each tab, and what to add to your Roadmap if you find it.
Technical Master: Scan the Title, Meta Description, and H1 columns. Skip any rows where the Status Code is 301, 302, or 4xx, and any paginated URLs (e.g., /page/2/). For everything else, if you find any of the following, add the corresponding task to your Roadmap and label it Quick Win in Column B:
- Blank or duplicate title tags > “Fix title tags”
- Blank or duplicate meta descriptions > “Fix meta descriptions”
- Pages missing an H1 or with more than one H1 > “Fix H1s”
Then sort by the Inlinks column, lowest to highest. If your most important pages (e.g., practice area pages) have very few internal links pointing to them, add “Add internal links to under-linked pages” and label it Quick Wins.
Then sort by the Status Code column. If any pages return a 4xx error, add “Fix broken internal links” and label it Quick Wins.
Redirect Audit: Each row in this tab represents one hop, so a three-hop chain appears as three consecutive rows with the same starting URL. Scan for any starting URL that takes more than one hop to reach its endpoint. If you find them, add “Clean up redirect chains” to your Roadmap and label it Quick Wins.
GSC Tech Issues: Look at the indexing errors you exported from GSC. If any pages are excluded by robots.txt but shouldn’t be, add “Fix robots.txt exclusions” to your Roadmap and label it Quick Win.
CWV Issues: Scan your CWV Issues tab. If the only flagged issues affect a small number of pages, add “Fix Core Web Vitals issues” to your Roadmap and label it Quick Win. If the issues affect large groups of pages, you’ll address them in Phase 4 as part of your broader technical work. A common example: if oversized images are flagged on a handful of key pages, that’s a quick fix; aim to get images under 100KB for most pages, and no more than 200KB for hero images or large banners. If the same issue spans hundreds of pages, that’s a Phase 4 project.
Content Audit: Look at your Action Item column for pages labeled “High Impressions, Low CTR.” If you find them, add “Improve title tags and meta descriptions” to your Roadmap and label it Quick Win.
Broken Backlinks: If your Broken Backlinks tab has any rows, add “Set up 301 redirects for broken backlinks” to your Roadmap and label it Quick Win.
Google Business Profile: There’s no audit tab for this one. Go to business.google.com and search for your business name. If your profile isn’t claimed and verified, add “Claim Google Business Profile” as a Quick Win.
Once you’ve reviewed the audit tabs, rows labeled Quick Wins in column B of your Roadmap tab represent tasks you can complete in the first two weeks that’ll improve your site.
Build the Rest of Your Roadmap
The table below lists every task across the remaining phases. Add each one to your Roadmap now. For tasks with a condition, check whether that condition applies to your site. If it does, add it. If it doesn’t, skip it.
Task | Condition |
Technical Foundation | |
Audit and clean up URL structure | Always |
Verify and submit sitemap | Always |
Review and correct robots.txt | Always |
Confirm HTTPS and fix mixed content | Your site loads as http:// |
Identify and fix Core Web Vitals issues | Your CWV Issues tab has flagged groups affecting large numbers of pages |
Review and fix mobile usability issues | Always |
Implement schema markup | Always |
On-Page Optimization | |
Build Keyword Map for all key pages | Always |
Audit heading quality on priority pages | Always |
Optimize content on priority pages | Always |
Update image file names and alt text | Always |
Build internal linking framework across clusters | Always |
Content Strategy | |
Build Cluster Map tab in Content Master Sheet | Always |
Cross-reference Cluster Map gaps with Keyword Gap tab | Always |
Pull Update and Improve and Consolidate pages from Content Audit | Your Content Audit has pages labeled Update and Improve or Consolidate |
Build Content Calendar tab in Content Master Sheet | Always |
Assign due dates and owners, sort by priority | Always |
Local SEO | |
Confirm NAP accuracy in GBP | Always |
Set primary and secondary categories | Always |
Add complete services list | Always |
Set accurate business hours | Always |
Upload photos | Always |
Write GBP description | Always |
Set up monthly GBP audit reminder | Always |
Build review request process | Always |
Audit and clean up citations | Always |
Set up GBP for each additional location | You have more than one physical office |
Add each location as its own cluster in Content Master Sheet | You have more than one physical office |
Authority Building | |
Review Link Gap tab and identify top outreach targets | Always |
Research why competitors earned those links | Always |
Identify guest posting targets | Always |
Submit to relevant high-quality directories | Always |
Set up media monitoring | Always |
Build journalist outreach list | Always |
Launch first outreach campaign | Always |
Review Content Calendar for link-worthy content | Always |
Add link-worthy content to calendar if missing | Always |
Assign an owner and a target completion date to each task. A shared spreadsheet or a project management tool both work. Most important is that the plan is written down, reviewed monthly, and updated as priorities shift.
Set Goals and KPIs
Before you start executing, tie your SEO goals to your business goals. Open your Baseline Metrics tab and use those numbers as your starting point. Goals grounded in where you actually are today are more useful than aspirational targets pulled from thin air. Goals that connect to outcomes look like:
- Increase qualified leads from organic search by X% in 12 months
- Rank in the top 3 for high-intent transactional queries within 9 months
- Appear in the Google Maps 3-pack for target locations within 6 months
- Grow conversions from organic search by X per month
Create a new spreadsheet and name it SEO Metrics. Add your first tab and name it Goals. Set up these columns across row 1:
- Metric
- Baseline
- Goal
- Target Date
In Column A, write the metric you’re tracking. In Column B, pull your current numbers from your Baseline Metrics tab. In Column C, write your goal for that metric (for example, “increase by 25%” or “reach 15 leads per month”). In Column D, set a realistic target date.
AI search visibility is worth tracking too, even though the tools are still catching up. Tools like PromptWatch, Semrush, Authoritas, and Otterly.ai are emerging to track AI Overview and LLM mentions and citations. Manual testing is useful as well. Search your target queries directly in Google, ChatGPT, and Claude and note any citations or mentions. Keep in mind that AI outputs vary based on a user’s settings and history, making consistent tracking harder than with traditional search.
Add a second tab to your SEO Metrics spreadsheet and name it AI Visibility. List the queries you want to monitor in Column A. If you’re using a tool like Semrush, Authoritas, or Otterly.ai, these are the queries you’ll input to set up your tracking.
Phase 3: Quick Wins (Weeks 1-2)
Your Roadmap tab has your Quick Wins list. Work through each one using the instructions below.
Fix Title Tags, Meta Descriptions, and H1s
Open your Technical Master tab. Filter each of the following columns to find problem pages — blank or duplicate values are what you’re looking for:
- Title: blank or duplicate values
- Meta Description: blank or duplicate values
- H1: blank or duplicate values
Open your Technical Master tab. For each page flagged, here’s what you’re working toward:
- Title tags: Include the primary keyword, keep it under 60 characters, and be specific. “Personal Injury Lawyer in Atlanta” tells Google and the searcher what the page is. “Welcome to Our Website” does not.
- Meta descriptions: Keep them under 155 characters, match what the searcher is looking for, and give them a reason to click.
- H1s: It should match the page’s topic closely. If a page has none, add one.
Improve Underperforming Title Tags and Meta Descriptions
Open your Search Performance – Pages tab and filter for pages labeled “CTR Fix.” These pages are ranking and earning impressions but not getting clicks, which usually means the title tag or meta description isn’t giving searchers a reason to click. Rewrite them using the title tag and meta description standards in the previous section.
Fix Broken Internal Links
Open your Technical Master tab and sort by the Status Code column. Find any pages returning a 4xx error. These are broken pages that other pages on your site may still be linking to.
To find which pages are linking to them, re-run your Screaming Frog crawl. Once it completes, click the Internal tab and filter by HTML. Click on a URL returning a 4xx error and look at the bottom panel. The Inlinks tab will show every page on your site linking to it. Open each of those pages and update the broken link to a relevant live URL. If no good replacement exists, remove the link entirely.
Clean Up Redirect Chains
Open your Redirect Audit tab. Each row represents one hop, so a chain appears as multiple consecutive rows stepping from the original URL through to the final destination. For each chain, update the original source URL to point directly to the final destination, cutting out the middle hops. For step-by-step instructions on setting up redirects, see our guide to implementing redirects.
Set Up 301 Redirects for Broken Backlinks
Open your Broken Backlinks tab. Each row represents an external site linking to a page on your site that no longer exists. These are worth fixing because the linking site has already chosen to reference you. A 301 redirect recovers that link equity by sending both users and Google to a relevant live page.
For each broken URL in your Target URL column, ask yourself if it’s a backlink worth preserving. If it’s a bad website, don’t bother. If it’s worth preserving, set up a 301 redirect to the most relevant live page on your site. If no closely related page exists, redirect to your homepage as a fallback. For step-by-step instructions on setting up redirects, see the redirect implementation guide linked in the Clean Up Redirect Chains section above.
But be careful. When you 301 redirect a URL, you’re passing along its anchor profile too. You want to be careful not to pass along too many exact-match or spammy anchors.
Compress Images
Open your CWV Issues tab and look for any image-related issues flagged across a small number of pages. For each affected page, identify the oversized images, download them, run them through an image compressor like Tinify, Squoosh, or ShortPixel, and re-upload the compressed versions. Aim for under 100KB for standard web images and under 200KB for hero images or large banners.
Add Internal Links to Under-Linked Pages
Open your Technical Master tab and sort by the Inlinks column, lowest to highest. Your most important pages (e.g., service pages) should have multiple internal links pointing to them from relevant supporting content.
Find those supporting pages, open them, and add contextual links where they fit naturally. Use descriptive anchor text but don’t spam internal links with keyword-rich anchors.
Claim Your Google Business Profile
If your GBP isn’t claimed and verified yet, go to business.google.com, search for your business name, and follow the prompts. If your business doesn’t appear, select “Add your business to Google.” Google will verify ownership, usually by mailing a postcard to your business address. Full GBP optimization is covered in Phase 7.
Phase 3 Checklist
Task | Tab / Tool | |
Fix blank or duplicate title tags | Technical Master | |
Fix blank or duplicate meta descriptions | Technical Master | |
Fix missing H1s | Technical Master | |
Rewrite underperforming title tags and meta descriptions | Search Performance - Pages | |
Fix broken internal links | Technical Master, Screaming Frog | |
Set up 301 redirects for broken backlinks | Broken Backlinks | |
Clean up redirect chains | Redirect Audit | |
Compress oversized images | CWV Issues, image compressor | |
Add internal links to under-linked pages | Technical Master | |
Claim and verify Google Business Profile | Google |
Phase 4: Technical Foundation (Months 1-3)
Technical SEO is the infrastructure layer of your website. Everything built on top of it depends on it working properly. Most of the technical work happens once. After that, it’s mostly maintenance.
Site Architecture and URL Structure
Re-run your Screaming Frog crawl. Once it completes, click Crawl Analysis in the top menu bar and let it run. When it finishes, go to Visualisations > Crawl Tree Graph. This shows you how your site is actually organized:
- Parent and child relationships between pages
- How content clusters together
- Where pages are disconnected
A well-structured site groups related content in a logical hierarchy. A personal injury firm might have a main personal injury page at the top, with individual pages for car accidents, truck accidents, slip and falls, and wrongful death sitting beneath it. Each of those might have further supporting content below them: specific injury types, related FAQs. That’s a healthy cluster. If the main page exists but nothing sits beneath it, or supporting pages exist but aren’t connected to a parent, those are gaps to note.
To find pages buried too deep for Google to crawl efficiently, click the Links tab, open the filter dropdown, and select “Pages With High Crawl Depth.” Any page at depth 4 or deeper is worth either restructuring or adding internal links to so it’s easier to reach.
As you work through the Crawl Tree, create a new spreadsheet and name it your Content Master Sheet. Add a first tab and name it Cluster Map. Set up four columns:
- URL
- Cluster
- Level
- Status
For each page you can see in the Crawl Tree, add a row. Enter the page URL in Column A, the topic cluster it belongs to in Column B (e.g., “Personal Injury”), whether it’s a Pillar or Supporting page in Column C, and whether it Exists or is a Gap in Column D. Gaps are pages that should exist based on the ideal structure but don’t yet. You’ll build on this in Phase 6 when you add keyword data and finalize your content priorities.
While you’re here, review your URL structure. URLs should be short, descriptive, and reflect the page’s place in the hierarchy. yoursite.com/personal-injury/car-accident-lawyer is clear. yoursite.com/page?id=847 tells Google and the visitor nothing.
If you need to clean up URLs, follow a logical structure that reflects your topical hierarchy. Every URL change requires a 301 redirect to preserve whatever link equity that URL has built up. Make the change and the redirect at the same time.
XML Sitemaps
Your sitemap tells Google which pages you want crawled and indexed.
Step 1: Check if yours exists. Type yoursite.com/sitemap.xml directly into your browser. If a page loads with your URLs listed, you have one. Other common locations to check:
- yoursite.com/sitemap_index.xml (WordPress with Yoast SEO)
- yoursite.com/wp-sitemap.xml (WordPress default)
Step 2: Generate one if needed. On WordPress, Yoast SEO or RankMath generate sitemaps automatically. On Squarespace and Wix, sitemaps generate automatically at yoursite.com/sitemap.xml. For custom-built sites, use Screaming Frog: go to Sitemaps > Create XML Sitemap and save the file to your server’s root directory.
Step 3: Submit to Google.
- Open Google Search Console
- In the left sidebar, click Sitemaps (under Indexing)
- Enter your sitemap URL and click Submit
Check back after 24 to 48 hours. GSC will confirm whether Google processed it successfully and how many URLs it found.
Keep the sitemap current. Include only pages you want indexed and remove any you don’t, like staging pages, duplicate content, and pages with noindex tags. On WordPress with Yoast or RankMath, your sitemap updates automatically. On a custom-built site, regenerate it in Screaming Frog whenever you add or remove significant pages.
Robots.txt
Type yoursite.com/robots.txt into your browser to view your file. A correctly configured robots.txt looks like this:
User-agent: *
Disallow: /wp-admin/
Disallow: /wp-login.php
Sitemap: https://yoursite.com/sitemap.xml
User-agent: * applies the rules to all crawlers. Disallow: blocks whatever path follows. The example above keeps admin and login pages out of search while leaving everything else open. The Sitemap: line points crawlers to your sitemap.
Do three checks:
- Are admin, login, and staging paths blocked?
- Are there any Disallow: rules covering paths you do want indexed, like /services/ or /blog/? A single misplaced line can block Google from your most important pages without any visible warning.
- Is your sitemap URL referenced correctly at the bottom?
Once you’ve reviewed your robots.txt, use GSC’s URL Inspection tool to verify your most important pages are accessible. Paste each URL into the search bar at the top of GSC and it will tell you whether Google can access and index that page, and if not, why.
HTTPS
Type your domain into your browser. If it loads as http:// rather than https://, migrate it to HTTPS. It’s a confirmed Google ranking signal and a basic trust signal for anyone submitting a contact form.
Most hosting providers offer a one-click SSL certificate install in their dashboard. Check there first or contact your hosting provider’s support team. Once it’s enabled, load your key pages and check the address bar. If you see “Not secure” next to the URL, something on that page is still loading over HTTP and needs to be fixed.
Core Web Vitals
Open your CWV Issues tab. You logged the issue groups flagged across your site in Phase 1. Each row tells you the issue type, how many pages are affected, and the severity of the issue.
For each flagged issue group, use PageSpeed Insights (pagespeed.web.dev) to diagnose the specific fix. Enter the example URL from your CWV Issues tab and scroll to the Opportunities and Diagnostics sections. These give you the exact fix for each issue, like “reduce unused JavaScript” or “serve images in next-gen formats.”
Google’s PageSpeed Insights documentation explains what each recommendation means and how to address it.
Metric | Measure | Good | Needs Improvement | Poor |
Largest Contentful Paint (LCP) | Load time of the page's main content | ≤2.5s | 2.5s–4s | ≥4s |
Interaction to Next Paint (INP) | Responsiveness to user input | ≤200ms | 200ms–500ms | ≥500ms |
Cumulative Layout Shift (CLS) | Visual stability as the page loads | ≤0.1 | 0.1–0.25 | ≥0.25 |
Common causes of poor scores include large uncompressed images, render-blocking JavaScript, bloated page builders, and unoptimized fonts.
Mobile Optimization
Google crawls and indexes the mobile version of your site. Whatever it sees on mobile drives rankings for every search, on every device. Check your site on mobile devices, not just your browser’s mobile preview. As you browse, look for:
- Text that’s too small to read without zooming
- Buttons or links placed too close together to tap accurately
- Images or elements that overflow the screen or break the layout
- Pop-ups or overlays that are hard to close on a small screen
- Forms or contact buttons that are difficult to use with a thumb
Anything you catch manually is worth fixing. For a more systematic view, run your key pages through PageSpeed Insights and switch to the Mobile tab. It will flag usability issues alongside your Core Web Vitals scores and give you specific recommendations for each one.
Structured Data and Schema Markup
Structured data makes your pages eligible for rich results like FAQ dropdowns and star ratings. These can improve click-through rates by making your result more visible in search.
Schema Type | What It Does | Where to Use It |
LocalBusiness | Tells search engines your business name, address, phone, and hours in a structured format | Homepage, location pages |
LegalService | Identifies the site as a legal service provider | Homepage, service pages |
Person | Provides structured attorney profile details | Bio pages |
AggregateRating | Enables star ratings to appear in search results | Homepage, service pages |
BreadcrumbList | Shows breadcrumb navigation in search results | All pages |
On WordPress, Yoast SEO and RankMath handle most schema automatically. For anything beyond that, we recommend handing it off to a developer. If you want to explore it yourself first, Google’s Structured Data Markup Helper is a good starting point. Once schema is in place, use Google’s Rich Results Test to validate your markup and confirm what Google detects.
There are mixed signals (e.g., Search Engine Land, Otterly.ai) on whether schema improves AI search visibility. And Google recently deprecated support for the FAQPage schema, meaning it won’t qualify for FAQ rich results on search pages. It’s worth monitoring Google adding or deprecating support for schema, but what’s clear is that structured data helps search engines better understand and categorize your content, and that’s reason enough to implement it. Treat any AI upside as a potential benefit rather than a guarantee.
Task | Tab / Tool | |
Review site architecture via Crawl Tree Graph | Screaming Frog | |
Build Cluster Map tab in Content Master Sheet | Content Master Sheet | |
Review and clean up URL structure | Screaming Frog, CMS | |
Verify or generate XML sitemap | Browser, Screaming Frog | |
Submit sitemap to GSC | GSC | |
Review and correct robots.txt | Browser, GSC | |
Verify key pages with URL Inspection tool | GSC | |
Confirm HTTPS and fix mixed content | Browser, hosting provider | |
Diagnose and fix Core Web Vitals issues | CWV Issues, PageSpeed Insights | |
Check mobile usability on actual devices | Mobile device, PageSpeed Insights | |
Implement schema markup | Yoast, RankMath, developer | |
Validate schema with Rich Results Test | Google Rich Results Test |
Phase 5: On-Page Optimization (Months 1-3)
On-page optimization runs parallel to Phase 4. While your developer or web team works on technical fixes, you can optimize existing pages for content and relevance. No new content yet. This phase aims to improve and get the most out of what you already have.
Keyword Research and Mapping
You’ve seen what pages you have and how they’re organized. Now you’re figuring out what each page should rank for and where gaps exist for topics you should be targeting.
Open your Content Master Sheet and go to the Cluster Map tab. Add four new columns to the right of your existing ones: Keyword, Search Intent, Action, and Notes.
Open Ahrefs Site Explorer and enter your domain. In the left sidebar, click Organic Keywords. Sort by Position ascending so your best-ranking keywords appear at the top. The report shows you the keyword, your ranking position, and which page on your site is ranking for it.
As you work down the list, decide if the page ranking for the keyword is the right page. Fill in the Keyword and Search Intent columns for each match, and use the Action column to note what needs to happen next. Look for three things:
- Keywords ranking well where the page is the right match. The keyword fits the page and the intent aligns. Enter the keyword and intent in your Cluster Map and mark the Action as Keep.
- Keywords ranking poorly. The content may not be strong enough to compete. Enter the keyword you want the page to target, note the intent, and mark the Action as Update and Improve.
- Keywords where the wrong page is ranking. If two pages are competing for the same term, mark both rows as Consolidate in the Action column and note which URL should be the primary in the Notes column. If a page is ranking for a keyword it was never intended to rank for, mark it as Update and Improve and note the misalignment..
For pages in your Cluster Map that don’t appear in the Organic Keywords report at all, open Ahrefs Keywords Explorer, enter a topic related to the page, and find the right keyword. Check search volume and keyword difficulty, and pay attention to what intent the top results reflect (are they service pages, blog posts, or something else?). Pick the keyword that’s the best match, add it to your Cluster Map, and mark the Action as Update and Improve.
Be specific, especially if you’re a local service business. “Employment lawyer in Atlanta” reflects someone actively looking for legal help in a specific city. “Employment lawyer” could be anyone, anywhere, at any stage of research. Target the former.
Now open your Keyword Gap tab in your Master SEO Workbook. Filter by search volume descending and keyword difficulty under 40 as a starting point. These are keywords your competitors rank for that you don’t. Look for:
- Keywords that cluster around the same topic. If you see several variations around “workers compensation attorney Atlanta,” it suggests there’s enough search demand to justify a dedicated page. Add a new row to your Cluster Map, write out the URL you’d want that page to have, enter the primary keyword, mark the Status as Gap, and mark the Action as Create.
- Keywords that match a topic you already have a page for. Find that row in your Cluster Map and update the Keyword column if it’s a better target than what you have. If you update the keyword, mark the Action as Update and Improve.
- Keywords that cluster around a topic you haven’t covered at all. Add a new row to your Cluster Map. Write out the URL you’d want that page to have, mark the Status as Gap, mark the Action as Create, and fill in the Keyword and Search Intent columns. Those rows become your content priorities in Phase 6.
Heading Structure
You fixed missing H1s in Phase 3. Now check the quality. Open your Cluster Map and filter for Pillar and Sub-Pillar pages first. For each one, open the page directly and check:
- Does the H1 naturally include the primary keyword from your Cluster Map, or does it feel stuffed or forced? Rewrite it if needed so it reads naturally and reflects what the page is actually about.
- Do the H2s clearly and specifically define the main sections of the page, or are they vague?
- Do H3s break up longer sections where needed so the page is digestible?
Headers should tell Google and the visitor what each section contains. If they don’t, rewrite them.
Content Optimization
Your Cluster Map already tells you a lot. Pages marked Keep are ranking well for the right keyword, so they’re doing something right and you should probably leave those pages alone.
But for every priority page, it’s worth asking:
- Does this content match what someone searching that keyword wants?
- Does it answer the question they arrived with?
- Does it reflect genuine expertise, or could it have been written by anyone with an AI tool and 30 minutes to spare?
If the answer gives you pause, update the Action label in your Cluster Map to Update and Improve and add a note in the Notes column describing what needs to change.
Helpful, insightful content is more important than it’s ever been. AI-generated content is flooding search results and much of it looks identical. It even shares the same generic perspective. Google and LLMs tend to cite sources that demonstrate real authority and firsthand experience and ignore pages that could have been written by anyone or for any business. That’s the standard your Update and Improve pages need to meet.
As you work through each page, look for the most common gaps. Thin pages often lack sections that answer follow-up questions, examples that illustrate abstract points, or an FAQ section addressing common objections. A full rewrite is rarely necessary unless the page is fundamentally off-topic or fails to match the searcher’s intent.
Whether you use AI in your content production or not, your final product should reflect your insights, experience, and expertise. For law firms that means pages that sound like they came from an attorney who has actually handled these cases, talked to clients, and achieved favorable outcomes. Generic content built from a web search will lose to that every time.
By the time you finish, every priority page in your Cluster Map should have an Action label. Pages that need work should have a note in the Notes column describing what’s missing or what needs to change. That becomes your input for Phase 6 when you build your Content Calendar and start executing.
Image Optimization
Compression was handled in Phase 3. What’s left here is the metadata, meaning the information attached to each image that tells Google what it’s showing.
Open your Image Audit tab. Work through your Pillar and Sub-Pillar pages first by filtering the Source column to those URLs. For each image:
- Missing alt text: Filter the Alt Text column for blank rows. Open the page listed in the Source column and add alt text that accurately describes what’s shown (e.g., “Jennifer Martinez personal injury attorney reviewing case notes” rather than “attorney photo”). Alt text is primarily an accessibility feature that screenreaders rely on to describe images to visually impaired users. It can also help your images appear in Google Image Search.
- Generic file names: Scan the Destination column for file names like IMG_4032.jpg or AdobeStock_239443198.jpeg. Rename these to something descriptive (like car-accident-attorney-tampa.jpg) before the next time you upload or re-upload them.
Internal Linking Strategy
You added internal links to under-linked pages in Phase 3. This phase is about building a more systematic linking framework across your site, informed by the clusters you mapped in Phase 4 and the keyword work you completed in this phase.
The goal is to make sure authority flows to your most important pages and that related content connects in a way that reflects your cluster structure. A blog post about what to do after a car accident should link to your car accident practice area page. Your practice area page should link to related FAQs and supporting content.
Open your Cluster Map and add two new columns: Links to Parent and Links from Parent. Work through the map cluster by cluster. For each page, open it and check whether it links to its parent page and whether its parent links back to it. Mark Yes or No in each column. A No in either column is a link worth adding. If your site has hundreds of pages, doing this manually gets unwieldy. Screaming Frog and other tools can help you audit internal links at scale.
Use descriptive anchor text that reflects the topic of the page you’re linking to. A natural mix of descriptive phrases reads better to users and avoids over-optimization signals.
Prioritize getting links to your highest-value pages from content that already earns traffic. A supporting page ranking well for an informational query is a valuable source of internal link equity for the practice area page it sits beneath.
Phase 5 Checklist
Task | Tab / Tool | |
Run keyword research and map keywords to pages | Ahrefs, Content Master Sheet | |
Identify keyword gaps and add to Cluster Map | Keyword Gap, Content Master Sheet | |
Audit and rewrite H1s on Pillar and Sub-Pillar pages | Cluster Map, CMS | |
Audit H2 and H3 quality on priority pages | Cluster Map, CMS | |
Review content quality and label actions in Cluster Map | Cluster Map, CMS | |
Audit images and update alt text and file names | Image Audit, CMS | |
Audit and add internal links within clusters | Cluster Map, CMS |
Phase 6: Content Strategy (Months 2-6)
Your audit is complete. Your Cluster Map tells you what pages exist, what they should rank for, and where gaps are. Your Keyword Gap tab surfaced topics your competitors own that you don’t. Phase 6 is where you turn all of that into a content plan.
What the Searcher Wants
Before any page gets written, figure out what the person searching your target keyword actually wants. There are four types of search intent:
- Informational: The searcher has a question or is researching a topic. E.g., “What happens after a car accident?” Map such queries to FAQs and blog posts that provide clear, educational content.
- Commercial: The searcher is comparing options before making a decision. E.g., “Best personal injury lawyers in Denver.” Map these to service pages that establish your firm’s credibility and differentiate you from competitors.
- Transactional: The searcher is ready to hire. E.g., “Car accident lawyer in Miami.” Map these to service pages too and be sure there’s a clear and easy way to contact your business.
- Navigational: The searcher is looking for a specific brand or website. Your homepage will typically handle this on its own. It’s usually not something you need to engineer in your content strategy.
Google’s AI Overviews have historically triggered most often on informational queries, and when they do, users can get a complete answer without ever clicking through to your site. That doesn’t make informational content worthless. Content that earns AI citations still puts your firm in front of searchers at the research stage.
But now, some studies are finding AI Overviews increasingly triggered by commercial queries too, which means even comparison and evaluation searches may resolve on the results page. Build informational and commercial content with the understanding that visibility in AI results is itself a meaningful outcome, even without clicking through to your site.
Build Your Content Calendar
Your Cluster Map is already populated with every page on your site, its keyword target, and an Action label telling you what needs to happen. Now you’re turning that into a prioritized execution plan.
Open your Content Master Sheet and add a new tab named Content Calendar. Set up these columns: Due Date, URL, H1, Page Title, Page Type, Keyword, Search Intent, Action, Notes.
Go through your Cluster Map and identify every page marked Create, Update and Improve, or Consolidate in the Action column. These are the pages that you’ll need to add to your calendar. As you do so, be sure you prioritize which pages to address first and adjust priority as your strategy evolves.
- Pillar and Sub-Pillar pages. These are the skeleton of your site. If a Pillar page is missing, thin, or competing against itself, everything beneath it underperforms too. Any Pillar or Sub-Pillar page marked as Create, Update and Improve, or Consolidate should be at the top of your calendar.
- Pages around services that drive your most valuable business. Don’t let low-priority supporting pages jump ahead of the content that actually moves the needle.
- Pages already getting impressions but underperforming. Those are often faster wins than building new pages from scratch.
- Pages targeting keywords with higher search volume and lower difficulty.
- Supporting pages that sit beneath a Pillar or Sub-Pillar you’ve already addressed.
Add a due date and an owner to each row, working from your highest priorities down. Sort by Due Date ascending when you’re done so your most urgent pages sit at the top. Publish consistently.
Phase 6 Checklist
Task | Tab / Tool | |
Build Content Calendar tab in Content Master Sheet | Content Master Sheet | |
Pull Create, Update and Improve, and Consolidate pages from Cluster Map | Cluster Map, Content Calendar | |
Prioritize and assign due dates and owners | Content Calendar |
Phase 7: Local SEO (Months 1-6)
If your business has a physical location or serves a defined area, local search is your most direct path to new clients.
What’s more, AI search is becoming a local search channel in its own right. Google’s AI features pull from the same signals that drive map pack visibility (GBP data, citations, reviews) and surface local results within AI-generated answers. ChatGPT, powered by Bing, has its own maps integration.
Google’s AI Overviews and AI Mode and LLMs like ChatGPT will sometimes even recommend specific businesses by name when a user asks for local help. The work you do in this phase to build a strong local presence feeds all of those channels.
Google Business Profile Optimization
You claimed your GBP in Phase 3. Now you’re optimizing it. Open your GBP dashboard at business.google.com and work through each element:
- Business name, address, and phone number. Confirm these are accurate and match exactly what appears on your website and across your citations. Inconsistencies are confusing and can affect local rankings.
- Categories. Set a specific primary category. “Personal Injury Attorney” outperforms “Lawyer” for relevant local searches. Add secondary categories for each additional practice area your office handles.
- Services. List every service you offer at that location. Be thorough because it gives Google more context about what you do and gives potential clients a clearer picture of what you handle.
- Business hours. Set them accurately. A profile marked closed at 5pm can disappear from the 3-pack for evening searches, even against competitors with weaker profiles overall. If your firm answers phones around the clock, set your business hours to 24/7.
- Photos. Upload photos of your office exterior, interior, signage, and attorneys. Photos signal to Google and to prospective clients that you’re a real, active practice.
- Description. Write a description that covers your practice areas, what differentiates your firm, and a light call to action. Think of it as a short elevator pitch. Be clear, specific, and focus on the client.
Google can edit your profile without notice. Categories might get changed or information updated. Build a monthly GBP audit into your routine. It takes 15 minutes and can save you from losing map pack positions.
Reviews and Reputation
Reviews are one of the most direct ranking factors in the map pack and the most visible trust signal for anyone deciding who to call.
Build a consistent review acquisition process. After a positive client engagement, send a direct link to your GBP review page. Most clients who would leave a review simply don’t because no one asked.
Respond to every review. For positive reviews, acknowledge the outcome briefly and keep it professional. For negative reviews, respond calmly, acknowledge the concern, and offer resolution where appropriate. Your response is public, so every prospective client reading your reviews will see how your firm handles feedback. Make sure it reflects well on your firm.
Local Citations
Your name, address, and phone number should be identical across every directory where your firm appears. Inconsistencies send conflicting signals to Google and can suppress local rankings.
Audit your citations using BrightLocal or a similar tool and clean up inconsistencies across the directories that carry the most weight. Start with Google, Bing Places, Yelp, Apple Maps, and any industry-specific directories relevant to your business.
Multi-Location Businesses
Set up a separate GBP for each of your business’s physical locations and optimize each one following the same steps above.
On the content side, treat each location as its own cluster in your Content Master Sheet. It should have its own pillar page, supporting pages, and local keyword targets. A page that swaps a city name into a template doesn’t establish local relevance. Create content reflecting genuine knowledge of and presence in the location.
Phase 7 Checklist
Task | Tab / Tool | |
Confirm NAP accuracy in GBP | Google Business Profile | |
Set primary and secondary categories | Google Business Profile | |
Add complete services list | Google Business Profile | |
Set accurate business hours | Google Business Profile | |
Upload photos | Google Business Profile | |
Write GBP description | Google Business Profile | |
Set up monthly GBP audit reminder | Calendar | |
Build review request process | Google Business Profile | |
Respond to existing reviews | Google Business Profile | |
Audit and clean up citations | BrightLocal | |
Set up GBP for each additional location | Google Business Profile | |
Add each location as its own cluster in Content Master Sheet | Content Master Sheet |
Phase 8: Authority Building (Months 3-12)
Authority building is the most time-intensive phase but produces the most durable gains. Links from credible, relevant sources remain one of the most significant ranking signals Google uses, and building a strong backlink profile takes consistent effort over months.
The logic traces back to Google’s original PageRank algorithm, which borrowed from academic citation analysis: a page linked to frequently by credible sources is likely authoritative. That logic still holds. What’s changed is that Google has become very good at distinguishing earned links from manufactured ones.
What Makes a Strong Backlink
A single link from a well-regarded website carries far more weight than dozens of links from low-quality sites. Google considers quality of links, not just quantity.
For service businesses, the sources that carry the most weight tend to be:
- Industry publications and professional associations
- Press releases with regional distribution
- Local news outlets
- Regional professional organizations
- Community groups and chambers of commerce
- High-quality industry directories
Build Your Outreach List
Open your Link Gap tab from Phase 1. These are domains linking to your competitors, so they’ve already shown a willingness to link to content in your space, which makes them warm outreach targets.
Work through the list and identify the most relevant domains. For each one, figure out why they linked to your competitor. Was it a guest post, a resource mention, a news story? That tells you how to approach them. Mark your top targets in the Outreach Priority column and label them “Outreach Target.”
By the end of this step you should have a prioritized list of domains to contact and a clear sense of why each one is worth pursuing.
Review Your Content for Link-Worthiness
Outreach gets easier when you have something worth linking to. Open your Content Calendar in your Content Master Sheet and review it through that lens. Are there any pages or topics that other sites might consider referencing?
A few formats that tend to earn links:
- Original analysis of industry trends or local market data
- Definitive guides on a complex practice area topic
- Infographics that make a complicated process easy to understand
- Commentary on significant legal developments in your jurisdiction
If your calendar is missing content like this, add it. Flag those pages in your Content Calendar Notes column as “Link Target” so they get prioritized in production.
Execute Your Outreach
With your target list and link-worthy content in hand, here are the main ways to earn links:
- Guest posting. Contributing articles to publications your audience reads earns links, builds brand exposure, and establishes authority outside your own site. Build relationships with editors before pitching. A pitch from someone who has already been a useful source is usually more successful than cold outreach.
- Digital PR. Make your attorneys’ expertise available to journalists covering your practice areas. Monitor Qwoted and Connectively for queries where your attorneys can serve as credible sources. Develop relationships with local reporters. The goal is to become a reliable source so that when a relevant story breaks, they call you.
- Local and industry directories. Submit your firm to relevant, high-quality directories that your clients use. A listing in a respected legal directory or a local chamber of commerce site carries more weight than a generic web directory.
Your Authority Building Action Plan
By the end of this phase you should have:
- A prioritized outreach list in your Link Gap tab with your top target domains labeled and a note on why each is worth pursuing
- A set of link-worthy content topics flagged in your Content Calendar
- Active outreach underway through at least one channel: guest posting, digital PR, or directory submissions
Create a new spreadsheet and name it Link Building Tracker. Set up these columns: Domain, Contact, Contacted, Method, Status, Date Earned, Link URL, Anchor Text.
Method is the type of outreach: guest post pitch, digital PR, directory submission, journalist source request. For the Status column, use labels like Identified, Contacted, In Progress, Earned, Declined, Not a Fit.
Domain | Contact | Contacted | Method | Status | Date Earned | Link URL | Anchor Text |
example.com | Sarah M., Editor | 6/1/2026 | Guest post pitch | In Progress | — | — | — |
example.com | Membership team | 5/15/2026 | Directory submission | Earned | 5/20/2026 | example.com/members/example-pi-law | Example Personal Injury Law |
example.com | James R., Reporter | 5/28/2026 | Digital PR | Contacted | — | — | — |
example.com | — | 5/10/2026 | Directory submission | Earned | 5/12/2026 | example.com/atlanta/pi-lawyers | Atlanta personal injury lawyers |
example.com | Content team | 5/5/2026 | Guest post pitch | Declined | — | — | — |
example.com | — | — | Directory submission | Identified | — | — | — |
Use the tracker sheet to log every outreach attempt and update the Status column as you go. It doesn’t need to be complex. What matters is that you have a record of what you’ve done and what’s working.
Authority building is ongoing. Add it to your monthly routine and track new referring domains in your SEO Metrics spreadsheet to see your backlink profile grow over time.
What to Avoid When Linkbuilding
Buying links, participating in link schemes, or using private blog networks violates Google’s guidelines. Google’s algorithms are good at identifying unnatural link patterns, and the penalties outweigh any short-term gains. Build links by being genuinely useful, credible, and worth referencing.
Phase 8 Checklist
Task | Tab / Tool | |
Review Link Gap tab and identify top outreach targets | Link Gap | |
Review Content Calendar for link-worthy content | Content Master Sheet | |
Create Link Building Tracker spreadsheet | Link Building Tracker | |
Identify guest posting targets and pitch editors | Link Building Tracker | |
Submit to relevant high-quality directories | Link Building Tracker |
Measuring and Monitoring (Ongoing)
Without consistent monitoring, you can’t tell what’s working, what’s slipping, or where to focus your effort next.
Measurement and monitoring are their own disciplines. Below is an overview of the metrics and tools to consider. As your SEO program matures, your reporting and diagnostic process will deepen alongside it.
Metrics to Consider
Metric | What It Tells You | Where to Find It | Review Frequency |
Organic sessions | Overall search traffic trend | GA4 | Monthly |
Organic conversions | Leads generated from search | GA4 | Monthly |
Keyword rankings | Visibility for your priority terms | Ahrefs, GSC | Monthly |
Map pack positions | Local search visibility | LocalFalcon | Monthly |
Impressions and CTR | How often you appear and how often you get clicked | GSC | Monthly |
Core Web Vitals | Page experience health | GSC | Quarterly |
Indexed pages | Whether Google is finding your content | GSC | Monthly |
Referring domains | Backlink growth over time | Ahrefs | Monthly |
Using Google Search Console
Build a monthly GSC review around these reports:
- Performance report – CTR. Filter by page to find which pages earn impressions but consistently earn few clicks across the queries. Those are your CTR Fix opportunities, the page is ranking but the title tag or meta description isn’t compelling users to click.
- Performance report – Rankings. Sort by position to surface keywords sitting between positions 8 and 20. Those make good targets for content revisions or optimization.
- Page Indexing report. Check for newly excluded pages and any fresh errors. Pay attention to pages that were indexed last month but not this month and investigate what might have changed.
- Core Web Vitals report. A spike in poorly performing URLs often traces to a site update or plugin change that introduced a problem.
Using GA4
GA4 tells you what happens after someone arrives on your site, like where they came from, which pages they land on, and whether they take the action you want.
Watch organic traffic as a share of total traffic, meaning organic compared to paid, direct, referral, and social. If the share is shrinking, it’s worth investigating whether search visibility has slipped or whether another channel is simply growing faster.
Watch conversions by channel. If organic traffic is growing but leads from organic search aren’t, there are a few possible explanations. The traffic may be the wrong type, like informational queries bringing in people researching rather than transactional queries bringing in people ready to hire. Or the traffic is the right type but something on the page is failing to convert it, like a weak call to action, a mismatch between what the searcher expected and what the page delivers, or a form that isn’t working.
Landing page performance shows you which pages are earning clicks and what visitors do once they arrive. A page with high traffic and low conversions is a conversion problem. A page with low traffic and high conversions is a visibility problem, meaning it’s working well for the people who find it, but not enough people are finding it.
Diagnosing Traffic Drops
Before jumping into diagnostics, it’s worth acknowledging that organic traffic is a complicated metric. Google’s AI Overviews and zero-click searches mean users can get answers directly on the search results page without ever visiting your site. Impressions can be strong and rankings can hold while traffic stays flat or dips. Check your impressions and rankings first before assuming a problem exists.
If impressions and rankings are also down, work through the diagnostic:
- GSC Page Indexing report: look for new indexing errors
- GSC Performance report: identify which pages or queries dropped
- Ahrefs: check ranking changes on key terms
- Google’s algorithm update history: did an update coincide with the drop?
- Your own recent changes: any site updates, content edits, or URL restructuring?
Most traffic drops trace to a technical issue, an algorithm update, or a content change that reduced a page’s relevance.
Measurement
Open your SEO Metrics spreadsheet. You already have a Goals tab and an AI Visibility tab. Add four more tabs to complete your long-term tracking setup:
Monthly Metrics: Set up a header row with Metric in Column A, Tool in Column B, and one column per month across the top starting with your current month. Add one row for each metric with the corresponding tool in Column B:
- Organic sessions, GA4
- Organic conversions, GA4
- Impressions, GSC
- CTR, GSC
- Indexed pages, GSC
- Referring domains, Ahrefs
Update each month by pulling the number from the tool listed in Column B.
Keyword Rankings: Set up a header row with Keyword in Column A, Target Page in Column B, and one column per month across the top. Pull your target keywords from the Cluster Map and add one row per keyword. Update monthly using Ahrefs or GSC and log the position for each keyword.
Map Pack: Set up a header row with Location in Column A, Keyword in Column B, and one column per month across the top. Add one row per location per target keyword and track positions using LocalFalcon. Update monthly.
Core Web Vitals: Set up a header row with Date in Column A, Issue in Column B, Platform in Column C, Example URL in Column D, Severity in Column E, # Affected URLs in Column F, and Status in Column G. Pull your issue groups from your CWV Issues tab in your Master SEO Workbook and add one row per issue group. Each quarter, add new rows for whatever issues GSC is showing at that point. Enter New in the Status column for issues appearing for the first time and Ongoing for issues that persist from a prior check.
Review your Monthly Metrics and Keyword Rankings tabs every month and compare against your Goals tab to see whether you’re on pace. Every quarter, review your Core Web Vitals tab and assess whether issues are being resolved. Every year, create a new set of tabs so your historical data stays clean and organized.
This is a starting point. As your SEO program matures, you’ll find better tools, more efficient workflows, and reporting that goes deeper than what’s outlined here. Keep refining it. The goal is a monitoring routine that gives you a clear, consistent picture of what’s working and what needs attention.
FAQs
How long does it take to see results from SEO?
Most sites see meaningful movement within 3 to 6 months of consistent, focused work. Technical fixes and on-page improvements can produce visible changes faster, sometimes within weeks. The bigger gains develop over 6 to 12 months as content depth and authority build. Newer sites and more competitive markets push those timelines further out.
What should I do first if my site has major technical issues?
This guide is set up to address such issues early. Work through your Phase 3 quick wins first, then move directly into Phase 4. Technical problems that prevent Google from crawling or indexing your pages limit what any other SEO work can accomplish. Get the foundation right before building on top of it.
How much content do I need to publish?
Quality and strategy beat volume. Ten well-researched, properly optimized pages targeting high-intent queries will outperform 50 thin, generic pages. Build a content calendar that prioritizes your highest-value keyword opportunities and publish consistently.
Do I need to hire an SEO agency or can I do this myself?
It depends on your industry, resources, and timeline. DIY SEO might be viable for small businesses in less competitive markets with someone willing to invest significant time in learning and execution. In competitive markets, the gap between DIY and professional execution is substantial.
When evaluating an agency, look for one that measures success the way you do: by qualified leads and signed clients or cases, not just rankings and traffic. And look for one that builds strategy specific to your market rather than recycling a playbook from their last client.
How do I know if my SEO is working?
Start with lead attribution. Make sure your Key Events in GA4 are set up to track contact form submissions and phone call clicks, and that you can trace those back to organic search as the source. Call tracking services like CallRail can add another layer here, connecting inbound calls to the specific pages and search terms that drove them. That’s what connects rankings and traffic to business outcomes.
From there, watch your leading indicators monthly: keyword rankings for your priority queries, organic sessions from transactional pages, and map pack positions. Those tell you whether your visibility is moving in the right direction.
But the real measure is qualified leads and cases from organic search. Rankings and traffic tell you the strategy is working, but leads and cases tell you it’s working for your business.
Is local SEO different from regular SEO?
Local SEO applies the same fundamentals with additional emphasis on your Google Business Profile, local citations, location-specific content, and review acquisition. For any business serving clients in a specific geographic area, local search typically drives as many or more direct inquiries as organic rankings.
What happens if Google updates its algorithm and my rankings drop?
Sites built on strong content, earned links, and solid technical foundations tend to weather updates without major disruption. A traffic drop after an update warrants methodical diagnosis. Check first whether the drop affects your whole site or specific pages, then look for technical issues, compare your content to what now ranks above you, and adjust. Chasing every algorithm update is counterproductive. Build something genuinely worth ranking.
Where to Go From Here
This guide gives you a starting point. Eight phases, a Master SEO Workbook, a Content Master Sheet, an SEO Metrics spreadsheet, and a Link Building Tracker. What’s left is the work.
SEO compounds. The businesses that find success online are the ones that stay at it. Execute consistently, review results monthly, and refine your strategy as you learn. The tools you use will grow more complex, your tracking will get more sophisticated, and your understanding of what works in your market will deepen.
Keep investing in all of it. The strategy that earns lasting results has always been the same: build something worth ranking, serve your audience well, and give Google every reason to trust you.
That’s the job.
